One my clients recently started a PoC with OneUptime. It’s an opensource alternative to DataDog. It’s not as polished, but shows a lot of promise.
Recently, I spent a few hours trying to get it talk to Slack so alerts can be pushed there. It wasn’t easy going and required a lot of wrangling with the API, cURL and trial and error. In the end, I got it working and figured I’d post here to other’s can maybe benefit from my pain.
A muppets guide to getting the right data out of OneUptime and into Slack.
- So, you’ll want to create workflow and select the
On Create Incidenttrigger. - In the “Selected Fields” box, add the following
{
    "monitors": {
      "name":true
    },
    "currentIncidentState": {
        "name": true
    },
    "incidentSeverity": {
        "name": true
    },
    "createdAt": true,
    "title" : true,
    "description" : true,
    "_id" : true,
    "projectId" : true
}
- Next, select the
Send Message to Slackcomponent. - Fill in the “Slack Incoming Webhook URL” with your Slack bot webhook (if you haven’t got one of those, watch this video Connect OneUptime to Slack using Workflows)
- In the “Message Text” box, add the following:
🚨🚨🚨🚨🚨🚨🚨🚨🚨🚨🚨🚨🚨🚨🚨🚨🚨🚨🚨🚨🚨🚨
*{{local.components.incident-on-create-1.returnValues.model.incidentSeverity.name}} Declared*

Incident State: `{{local.components.incident-on-create-1.returnValues.model.currentIncidentState.name}}`
Incident Title: *{{local.components.incident-on-create-1.returnValues.model.title}}*
Date: {{local.components.incident-on-create-1.returnValues.model.createdAt.value}}
Monitor: `{{local.components.incident-on-create-1.returnValues.model.monitors[0].name}}`

Description:
---
{{local.components.incident-on-create-1.returnValues.model.description}}
---

👀 See more here:
https://oneuptime.com/dashboard/{{local.components.incident-on-create-1.returnValues.model.projectId.value}}/incidents/{{local.components.incident-on-create-1.returnValues.model._id}}
- Make sure you connect all the components with the drag and drop connectors.
In Slack
It will look like this in Slack:
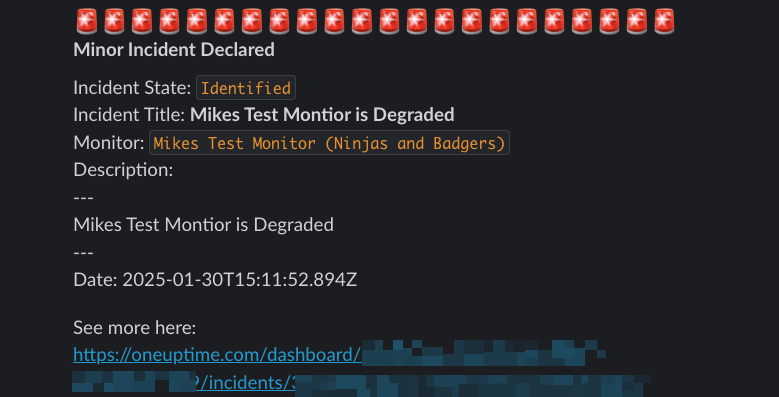
Obviously you can change how it looks, move stuff around and whatnot. If you’re a Slack bot pro, you can probably even create buttons to Acknowledge or Resolve requests.
Updating Slack with incident status changes
Your incidents will auto-resolve themselves when the monitor goes back into an operational state, or someone clicks ‘Acknowledge’ in the interface. You can also get these pushed into Slack with the following mumbo jumbo:
- Create a new workflow and set the trigger as
On Create Incident State Timeline(yeah, it’s not most obvious name). - In the “Select Fields” box in the trigger, add the following:
{
    "createdAt": true,
    "incident" : {
      "title" : true
    },
    "incidentState" : {
      "name" : true
    },
    "_id" : true,
    "rootCause" : true,
    "createdByUser": true
}
Now, if you don’t want to have the
Identifiedincident status appear (which you may not, as the first workflow will post the incident and this one will also post it), then add anIf/Elsecomponent and put{{local.components.incident-state-timeline-on-create-1.returnValues.model.incidentState.name}}in the “Input 1” box,Equal Toin the “Operator” andIdentifiedin the “Input 2 box”. Hit save.Connect the trigger to
If/Else(if you added it)Add a
Send Message to Slackcomponent, add the same Slack webhook as before, and the following in the “Message Text” box:
  🚨🚨🚨🚨🚨🚨🚨🚨🚨🚨🚨🚨🚨🚨🚨🚨🚨🚨🚨🚨🚨🚨
*[{{local.components.incident-state-timeline-on-create-1.returnValues.model.incident.title}}] State Changed!*

New State: `{{local.components.incident-state-timeline-on-create-1.returnValues.model.incidentState.name}}`
Date: {{local.components.incident-state-timeline-on-create-1.returnValues.model.createdAt.value}}
Incident Title: {{local.components.incident-state-timeline-on-create-1.returnValues.model.incident.title}}

Cause of change:
---
 {{local.components.incident-state-timeline-on-create-1.returnValues.model.rootCause}}
---

👀 See more here:
https://oneuptime.com/dashboard/{{local.components.incident-state-timeline-on-create-1.returnValues.model.projectId.value}}/incidents/{{local.components.incident-state-timeline-on-create-1.returnValues.model._id}}
- Connect the
Nopart of theIf/Elsecomponent to the Slack component. - Now you’ll get updates to the incident posted to the Slack channel too. Hurrah
The team at OneUptime are constantly making updates and are very responsive in their customer support channel. It’s definitely worth a try if you don’t want to empty your bank account straight into DataDogs!